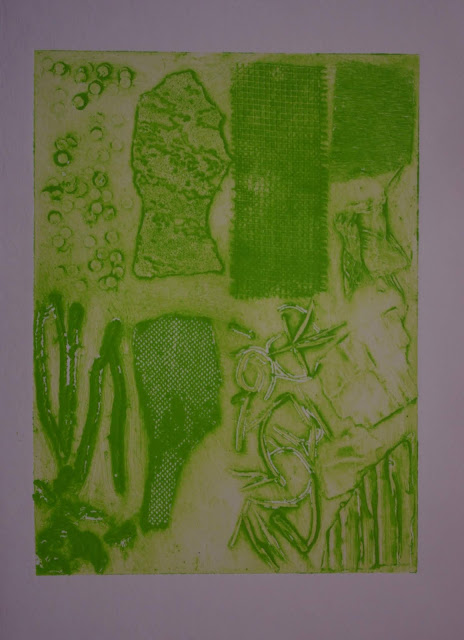
For the base plates I used the thick cardboard from the back of some art paper pads. These were A3 in size. Although I created A3 sized plates, I would later realise that I was running short of large sheets of printmaking paper. I would not be able to order any more until payday at the end of the month so it was necessary to cut my plates in half, forming A4 sized plates. I sealed my plates with spray-on acrylic varnish.
In the course notes, there were instructions for relief printing the plates by hand. However, in the research I had done, most of the prints which I like were printed by an intaglio method (inking and wiping, printing only the ink which remains trapped in the textures). I think that the course has been specifically designed to allow people to complete it without having access to a press. Given that I now have my own press and am keen to use it I decided to intaglio print my plate as well as intaglio with relief rolling over the top.
I used the small (low quality) felt I had from the FOME school press to protect the felt blankets on my new press from being damaged by the collagraph plates.
 |
| Print 1: Intaglio. Clockwise from top left. Foil, cork tile, nylon mesh, handmade paper, sewing thread, various fabrics, plastic potato net, plastic tarpaulin, printer paper, 'wundaweb' |
 |
| Plate 1: Anti-clockwise from top right. Foil, cork tile, nylon mesh, handmade paper, sewing thread, various fabrics, plastic potato net, plastic tarpaulin, printer paper, 'wundaweb' |
 |
| The same plate as above printed with a ghost of the intaglio inking in blue with a relief rollover in black |
 |
| Print 2: Clockwise from top left - paper ring reinforcers and metal washers, onion skin, various papers, wallpaper, dried camomile, rolled oats, masking tape, hessian and threads from hessian |
 |
| Plate 2: Anti-clockwise from top right - paper ring reinforcers and metal washers, onion skin, various papers, wallpaper, dried camomile, rolled oats, masking tape, hessian and threads from hessian |
 |
| The same plate as above printed with a ghost of the intaglio inking in blue with a relief rollover in black |
The highly textured items on the bottom row (hessian, rolled oats and camomile plant material) all held too much ink and I found them disappointing on the first intaglio print. However, when most of the intaglio ink had been removed on the first pass through the press, a relief rollover in black revealed their textures quite nicely. The opposite was true for the ring reinforcers and the wallpaper which were almost obliterated by the relief inking.
 |
| Print from the same plate as above with the ghost of the green intaglio inking and a relief rollover in indigo |
For the third print, I used a bright green which I mixed with some extender to make it a bit more translucent as well as a small amount of linseed oil jelly to make it easier to wipe. Once again, the more highly textured items such as the mesh took up too much ink but less marked textures such as the wallpaper and corrugated card printed well in intaglio. I did a rollover of indigo after the first pass through the press. I really like this colour combination of the pale green with the indigo. The textures really popped out with this rollover. The most disappointing element was the string. I had hoped to see the texture of it more clearly but it really just gathered a lot of ink in a halo around it because it stands proud of the plate and has a circular cross section.
 |
| Print 4: Clockwise from top left - crushed eggshells, bulgur wheat, woven placemat, kitchen roll, feathers, wallpaper, stiff lace, lentils |
 |
| Plate 4: Anti-clockwise from top right- crushed eggshells, bulgur wheat, woven placemat, kitchen roll, feathers, wallpaper, stiff lace, lentils |
 | |
|
What I learnt:
- Textural materials don't always print as you expect them to so it is best to try them before committing yourself
- Textured wallpaper works well with intaglio printing
- Intaglio inking is best for picking up subtle textures on thin materials
- Highly textured items are difficult to wipe when printing intaglio, they tend to accumulate too much ink
- Highly textured materials show up better when relief inked.
- Intaglio and relief inking can produce interesting results when combined on a single plate
- Selective inking in different ways on different parts of the plate could be an option
- objects that sit markedly proud of the plate cause deep embossing and a halo of white around them
- I could try to get round this by recessing the plate before applying thicker materials
I am enjoying this process of discovery and it has prompted me to read more about collagraph techniques and to try some more experimental plates before moving on.


No comments:
Post a Comment