For this project you will need a piece of lino approximately 30cm by 20cm (A4). Begin by marking out a grid on your lino of four squares by six squares. You can draw this directly onto the lino using a soft pencil. These will each be approximately 5cm square.
In each of these squares you will cut a variety of marks using a different cutting blade or approach.
In each of these squares you will cut a variety of marks using a different cutting blade or approach.
First I assembled a variety of cutting blades, a bench hook and a piece of standard battleship grey lino in A4 size. I had a cheap beginners Lino cutting kit containing three U shaped gouges of various sizes, one straight blade and one V gouge. These weren't great - they weren't particularly sharp but giving them a but of sharpening with the Arkansas stone followed by the slip strop with lots of honing compound helped (although they're still not my favourites.)
On a previous lino printing workshop at Leeds School of Art, I had been introduced to the wonderfully sharp Swiss Pfeil tools with mushroom shaped handles and had treated myself to three of these. I have two V shaped gouges one of which is very tiny (L 11/0.5) for fine detail. I also have a medium sized U shaped gouge.
 |
| Lino cutting tools, Arkansas stone and slip strop for sharpening |
I thoroughly enjoyed the process of mark making using a variety of tools and movements including rapidly executed lines, stabbing and twisting motions, circular gouging and rocking the blade from side to side while moving across the lino. I also made linear patterns using a number 11 scalpel blade.
However, when I came to print the test block, I encountered a problem. No mater how many times I passed the roller across the block with the oil used ink, it just didn't seem to cover it. I was working at Leeds print workshop and tried several times with more ink and increasing pressure on the press (we were using heat transfer printer on which the heating element no longer worked to print the lino) but I just couldn't get a nice clean print.
The technician at the print workshop came to my aid. He tried inking and printing the block with the same results. Eventually, we came to the conclusion that there was some sort of coating on the surface of the block which was preventing it from taking the ink. I hadn't thought to wipe the Lino before trying to print it. I've since learnt that some people go to the trouble of lightly sanding the Lino to give it a bit of a 'tooth' to accept the ink before they start carving. In my case it was only necessary to wipe it down with a solvent. First I cleaned the block with vegetable oil, then I went on to vigorously rub the surface with some odourless turps substitute. This worked and I was finally able to get a reasonable print after a morning of struggling.
 |
| Print before the plate was cleaned with solvent |
 |
| Print after cleaning with solvent |
One interesting change when the plate took up the ink better, was that the lines I'd made with the scalpel blade, which were clearly visible before, were now almost obliterated by the ink but just gave a grainy texture. This may prove useful in future projects.
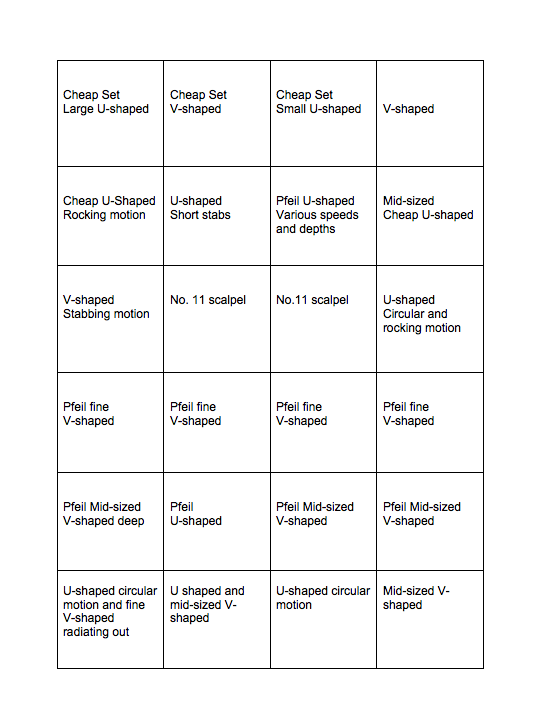
Below is a rough plan of how the marks that appear on the print were made:
No comments:
Post a Comment