Friday 30 September 2016

Gallery Visit: National Original Print Exhibition at Bankside Gallery

Click Here to link to the Bankside Gallery Website

On the 24th September I was in transit through London on my way back to Italy. I took a couple of hours for myself and visited the National Original Print Exhibition at Bankside Gallery. The gallery is on the the South Bank of the Thames right next to Tate Modern and the exhibition was free of charge. Below is the statement from the gallery website about the exhibition which is an annual event and about the organisation which holds it - The Royal Society of Painter-Printmakers.


"The National Original Print Exhibition, established by the Royal Society of Painter-Printmakers (RE), is an international open submission exhibition celebrating the best of contemporary printmaking. As an art organisation run by artists, the RE is constantly working to create long-term opportunities for artists and promote printmaking to a wider audience."

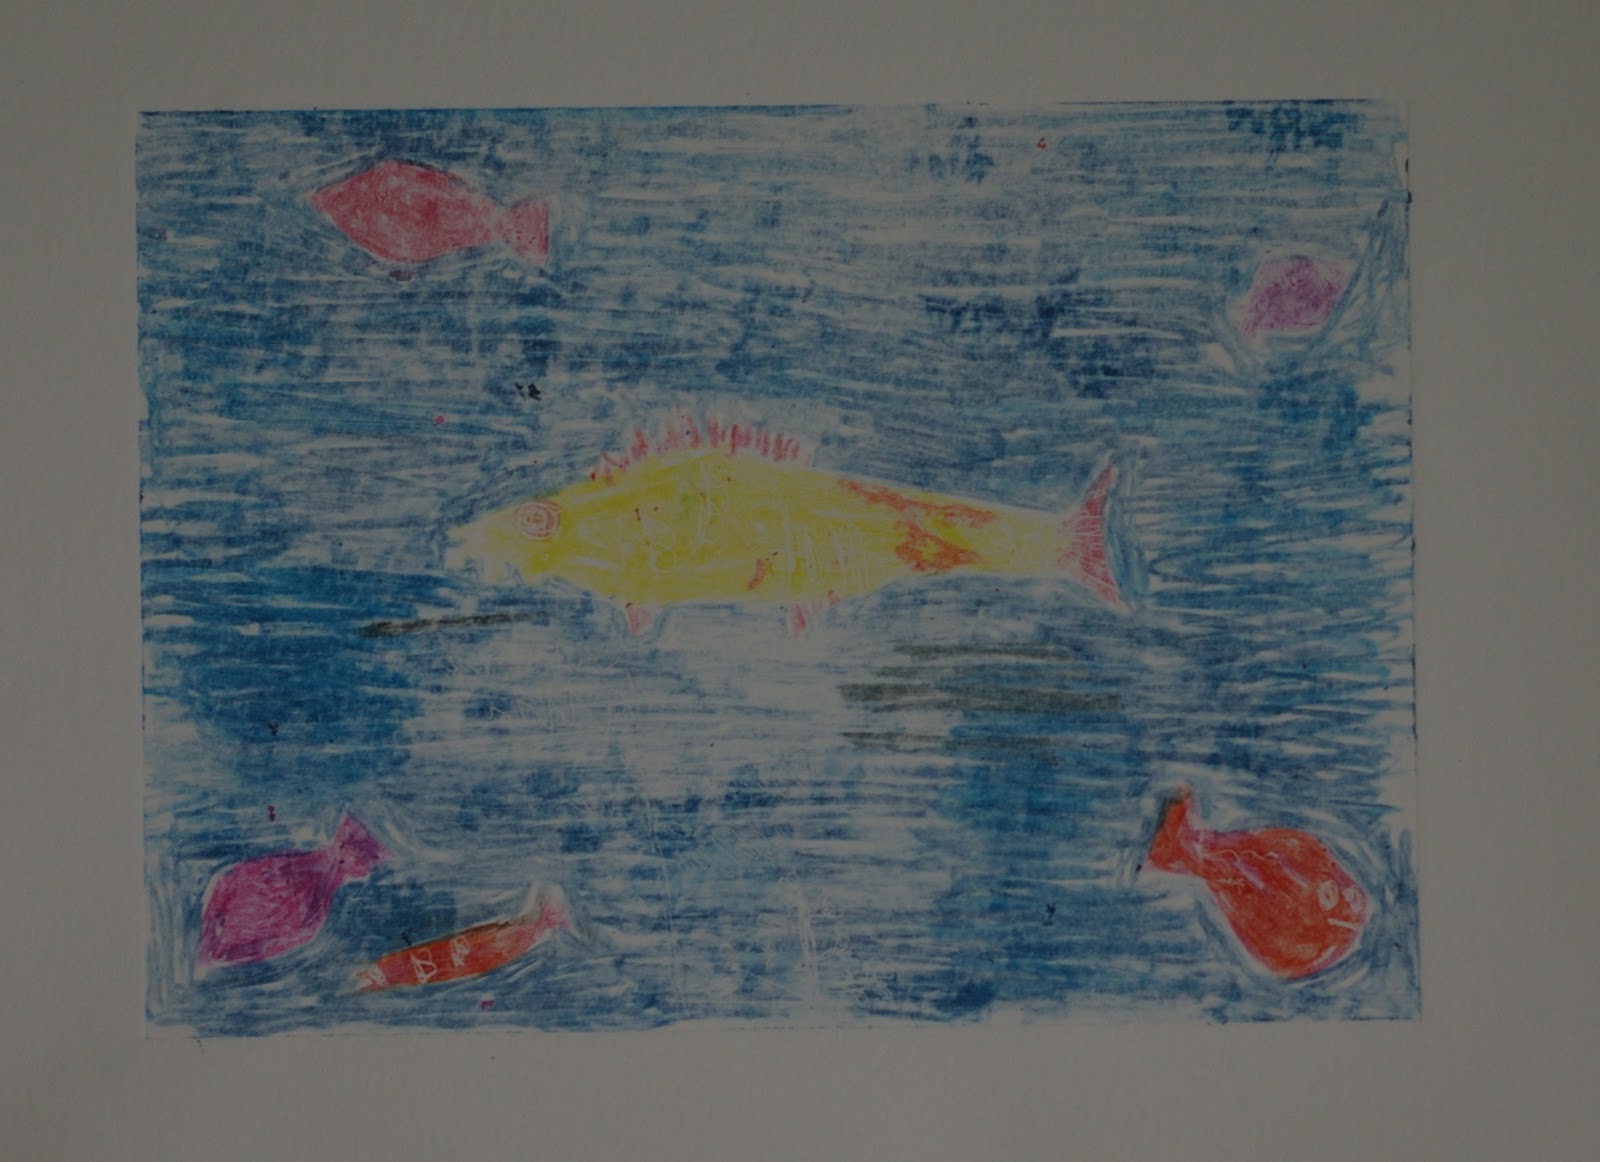
I did a first look around the room and then went around with my notebook and concentrated on certain works which attracted me as well as looking specifically for examples of monoprint.

The catalogue can be viewed online by clicking Here. However, in many cases the photographs in the catalogue do not do justice to the real prints as they are small in scale and also sometimes miss some of the subtleties of colour and layering of ink.

I had an emotional response to 'Not Even The Crumbs From My Table' a drypoint by Derek Mawudoku. (page 10/11 in the online catalogue - second image from the the bottom). This is a haunting image. Figures with sunken eyes (skeletal -looking) are behind a larger figure sitting at a table with a plate and a wine glass. The seated figure is large and spreads himself wide to block the clawing hand of the figure behind him who is desperately trying to get at the glass or plate on the table. The larger seated figure looks defiantly and directly out at the viewer making us complicit in the action. The blackness of the image suits the darkness of the subject and the scratchiness of the line work suits the clawing action of the hand of the starving man. This can be interpreted as a metaphor for the larger phenomenon of first world greed and third world poverty.

I especially liked the light effects in Grainne Dowling's etching and aquatint '7am Dublin'. (page 26 in the online catalogue) The combination of the silhouetted figures and shadows of the bridge with the very bright light reflecting off the pavement brilliantly capture the atmosphere of a chilly but bright morning light.

'Passing By' a wood engraving by Peter S Smith (page 9 of the online catalogue - bottom right) interested me. Although small in scale, it effectively conveyed the image of a human shadow passing the kerb and pavement by using abstract shapes each made up of tiny marks. The variety of marks employed in such small piece was impressive. Wood engraving allows for precision. There was stippling, hatching, meshing, parallel wavy lines.

Laura Rosser's woodcut 'GD*1Kanazawa' (Page 16-17) is a much larger scale work and is constructed almost entirely from vertical lines of varying thickness, spacing and overlap. It is a night scene - mainly black but with vertical lines of the architecture catching the light in places. The interior of the house is illuminated and the light escapes through vertical slatted blinds at the windows. The architectural features and the title suggest that this scene may be set in Japan. There are four figures in the interior. Three are grouped around a table - I cant quite make out whether they are having a meal served to them or whether they are playing a game. The fourth figure is further back and off to the right and has their head turned towards us - do they see us looking in or are they looking back towards the other group? There is also the impression of a fifth figure further back in the background which can almost but not quite be made out. The skill and planning which must have gone in to planning and executing this image are terrifying! However whet is also skillful is the manipulation of the viewer - looking at the scene I feel voyeuristic - like a stalker peeping in to someone's private world- or someone who has been excluded and looks longingly in through the window. The feel of this reminds me of Edward Hopper's Nighthawks or the feeling I got looking at some of Patrick Caulfield's illuminated interiors (from the outside).
In a small white rectangle to the right of the series of windows there is a series of marks - this may be a Japanese word - however to me it looks rather like the face of a cartoon teddy bear. This somewhat breaks the tension of the piece and once you notice it you can't un-notice it! I wonder whether this was intentional?

Another print which I was drawn to was 'Life Lines' by Ross Loveday (page 19 of the online catalogue). This was a monochrome abstract print of medium size (24x24cm) using a combination of drypoint and carborundum. I love the deep velvety blackness of the print and the fine wispy scratchiness of the lines. It almost looks like cranes at the mouth of a port. I am inspired to try out some drypoint and also playing about with some carborundum as I like the darkness and quality of line and texture in this print.

Impressive for its sheer size was the linocut 'Wild Awake' by Ade Adesina This can be viewed here on the artist's website and on page 8 of the online catalogue. This print measures 110 x 160 cm. It depicts what looks like a post-apocalyptic landscape with a parched, dried out earth some formations within which resemble the stones of the giant's causeway. There are Baobab trees dotted about and there appear to be whales flying in the sky - perhaps they have taken to the sky because of the lack of water in the seas? This could be a moment about environmental issues and man's destruction of the landscape. The scale of this piece made me think about the practicalities of printing something like this. It would have required great patience first of all to carve the lino by hand. Inking up such a large surface evenly would also be a challenge. You would need a very large printing press to print a piece this size - did he use a steamroller?

So far all of the prints I have commented on have been monochrome - I seem to be drawn to the dark velvety blackness of the printing ink. Now to move on to something a bit more colourful and search out the monoprints in the exhibition:

'Sea Forts' by Theresa Gadsby- Mourner uses a combination of monoprint and etching - the photograph in the catalogue does not do justice to the subtlety of this print. It looks as though the monprint has been built up in several layers in subtle gradations of grey and yellows and I think it has been printed on handmade Japanese paper. The etching component is brought in for the architectural features of these strange forts on legs out in the sea - I have since discovered that these were structures used during WWII and were then largely abandoned - they look a bit like the aliens from the war of the world about to stride onto the shore and claim it for themselves. Despite being a small and unassuming print I spent quite a while looking at this one - I love its subtle colours and textures.

The largest monoprint in the show and occupying a commanding position at the end of the room was 'Orange September'  an abstract monoprint by Morgan Doyle. Its colour scheme had a lot of impact with orange , red, grey and black its main colours. As a whole I am sorry to say that I found it a bit overwhelming and it wasn't to my taste - However, I did spend quite along time up close to it trying to decipher the many different ways of mark making that the artist had employed. There were areas that looked like decalcomania where something flat was applied t thick ink and pulled away leaving a characteristic texture. Marks were made by scratching and scraping into the ink and by wiping ink away. There were spatters of ink and possibly some backdrawing on top. Lots of things to try here.


Wednesday 28 September 2016

Painted monoprints : Further experiments - Water Based


What I did:

Having struggled with the oil based inks, I started off today by trying out some watercolour techniques I had read about which sounded interesting. 

I wanted to use the school press so I kept my work small. I used a piece of clear transparent plastic from a cheap picture frame that was slightly smaller than A5 sized. I drew onto this using neocolour water soluble crayons, taking a postcard of Paul Klee's 'The Golden Fish' as inspiration. I chose this image because it would be relatively simple to draw and contained bold and contrasting colours - its also offered scope for scraping into the layer of crayon as well as drawing directly as there are areas that appear to have been scraped back by the artist. 

I drew the goldfish and then surrounded it with a layer of very dark blue. I scratched into this blue layer using a toothpick. 

I printed this on to Strathmore 280gsm printmaking paper which I had soaked for a couple of minutes in cold water and then blotted dry. I decided on the correct pressure for the press by passing a blank plate through with the same paper. The pressure was enough to make a pleasing plate mark in the paper but not so much that it made the handle difficult to turn. 

The first print I pulled from this plate wasn't quite what I had expected. I could clearly see the crayon marks and everything had stayed exactly where it should be. It was clearly a drawn image. I had expected there to be a bit of running and mingling of colours - for it to be a bit more watercolour- like in appearance. The golden fish wasn't as vivid as I would have liked. Despite the fact that the crayon had not dissolved and moved around much it was still very difficult to see my sgrafitto marks from the toothpick. I think It would be necessary to have a very uniform dark background and very definite and somewhat wider white marks for them to be visible on the print. 


Print made using water soluble crayons on perspex printed onto
damp 200gsm Strathmore paper using a press


There was still a lot of crayon on the plate so I wondered whether I could achieve a more 'painterly' look by printing onto wetter paper. I soaked the same printmaking paper as before but this time I only blotted the back well, leaving the side facing the plate quite wet. This did achieve some marks that were more like painted watercolour in appearance and the yellow of the fish did transfer more boldly than in the previous print. However, it was clear that the paper was not evenly wetted as the crayon ran in some places and printed as drawn crayon marks in other areas. Where the paper was very wetted, the wet neocolour had bled out past the edge of the plate making unintended blue marks. 


Second print made from the same plate as above using wet
200gsm Strathmore paper and a press


Another technique I had heard of was to paint on a plate using watercolour and print onto wet paper after allowing it to dry. This was not as easy as it sounded. Perhaps predictably, it was really quite impossible to paint with watercolour onto my plastic plate - it just separated into beads much like it would over an area of wax resist. I put more and more of the paint on until it formed more of a pool. I then drew into the paint using neocolour crayons and water soluble coloured pencils. I based the design on a sketch in an old sketchbook of vineyards in winter with hills in the distance. I used a hair dyer to rapidly dry the watercolour and them printed onto soaked and blotted 280gsm printmaking paper as before. The result was not unattractive with the combination of painted areas and drawn lines. It was however a bit thin and pale so lacked great visual impact. 


Print made using watercolour paint and water soluble crayons
and pencils on perspex printed onto damp 200gsm
Strathmore paper using a press


I decided to base further monoprints on other sketches in my sketchbook. I used black water-based block printing ink (Schminke lino-printing ink) which I did not dilute or extend. This meant I was forced to work very quickly before the ink dried. I did a quick figure study based on a gesture drawing by Rodin. One problem that I encountered was that, having used and cleaned the plate several times, I had left a couple of greasy fingerprints on the plastic. The water-based ink refused to cover these and they can clearly be seen on the resulting print. I printed this onto the coated paper - I had been unimpressed with my hand pulled lino cut print on this paper with this ink and wanted to see how it would print when put through the press. It was better than when hand pulled but it made some strange marks around the figure where I had painted what had appeared to be a fairly uniform area of ink. 


Print made after Rodin using Schminke water-based lino
printing ink on perspex printed onto coated paper using a press


I re-inked this plate in a similar way and re-printed it onto 53gsm Botan paper from a trial pack of Japanese papers. The face was not so clear on this print but I particularly liked the way they the brush marks in the dark area showed up well. 


Print made using the same plate and ink as above
but printed onto 53gsm Botan paper

On the other half of this piece of paper I made another print based on a sketch I made at the american war cemetery at Cassino. I used the same water-based ink and achieved a similar result with nice brush marks visible because of the texture of the paper. I will use this paper again


Print made using Schminke water-based lino printing ink on
perspex printed onto 
53gsm Botan paper using a press


I then attempted to paint the plate into rough approximation of a landscape based on the one I had tried in watercolours earlier. Once again I painted onto the plate with unadulterated lino-printing ink. Although thinner than the oil-based ink it is still quite thick so there were a lot of dry brush marks on the resulting print which was pulled onto 62gsm pure silk white paper. The best area of this print was the dry brush effect giving an impression of distant rocky mountains. This could be further developed if printed in multiple layers.


Print made using Schminke water-based lino printing ink on perspex
printed onto 62gsm pure silk white paper using a press


Finally after washing and drying the plate I rolled a layer of the Schminke water based ink over the plate. I had problems again with greasy fingers which made obtaining an even layer very difficult. I drew a partially abstracted figure form into this ink layer with the wooden handle of a paintbrush and with toothpicks and a lolly stick. I then wiped around the figure with tissue leaving smears and streaks of ink. I printed this onto 51gsm Sekishu paper. I like this print but I would have preferred it to be darker. I want to try this reductive technique again using the oil based ink. 


Print made by wiping and scraping into a uniform layer of Schminke water-based
 lino printing ink on perspex printed onto 51gsm Sekishu paper using a press

 
When I was about to start cleaning up I noticed that there was still some ink left on the block which I didn't want to waste. I pressed my clean perplex plate onto the block several times to create random patches and spots of colour. Because there was quite a lot of white on the plate I decided to print this onto black paper. I then drew into the resulting print using a water-soluble white pencil taking my inspiration from cell organelles and endoplasmic reticulum it resulted in an abstract print. 

Print made using Schminke water-based lino printing ink on perspex printed onto
Canford 150gsm black paper using a press. Lines added using a white pencil.


What I learnt:

  • Water-soluble crayons and pencils have potential for printing given more practice
  • Degree of wetting of the paper makes a big difference to outcome
  • Paper weight and texture makes a big difference to print results
  • Water-based ink can be used without extender or acrylic medium
  • Water-based  ink can give reasonable coverage and depth of colour when using a press
  • I really like using reductive methods of drawing on the plate

Things to do and improve:

  • Try out the subtractive method of creating a mono print using oil-based ink
  • Try oil-based ink on dampened paper of various types
  • Try oil paints and printing medium in place of oil-based ink for monoprints
  • Still not paying enough attention when handling paper - dirty finger marks - need to address this
  • Still not making an attempt to register the plate and place it relative to the paper - need to work on this


Tuesday 27 September 2016

Painted monoprint from life: Second attempt

I wasn't at all satisfied with my previous attempt at this exercise; I had really struggled with handling the hawthorn inks even when diluted for this purpose. I had heard that Akua kolor liquid pigments were specifically designed for monoprints so I thought I'd have a try with these. They have the advantage of being easy to clean up with water even though they are oil based. 

These inks are much thinner than normal printing inks - for example trying to get them to roll out onto a plate was a disaster as the roller just slid all over the place and ro rolling out occurred. They really are designed for the painterly print not other types of monoprint. 
They are not, however, particularly easy to handle even for this technique. 

I decided to base the design on an old sketch from a previous A3 sketchbook or an orchid and a turned wooden bowl on some fabric. I placed the sketch under a sheet of Perspex and then painted the design on the perspex and pulled the print by hand onto a sheet of thin Chinese paper. 

The results were not impressive - very little of the ink had coloured the paper. I think it was a combination of too little ink (which dried quickly as I was painting) and quite an absorbent paper. 


I tried again with the same paper but using a lot more ink. This wasn't any more successful. Given that the ink is quite thin it has a tendency to smear everywhere if you apply too much. Also after 24 hours a clear halo of oil could bee seen around the thick areas of ink. The oil was leaching away from the pigment into the paper. 


I also found that even though the ink was thick on the second one, the colours were not particularly vivid. I noticed that one of the more opaque of the colours was the white so I decided to try painting with lighter colours containing lots of white onto black paper. The black paper was smoother and less absorbent - so I hoped that more of the ink would stay on the surface rather than being absorbed. 

I hinged the paper over my plate using masking tape - that meant that I could keep lifting the paper to look at my image and add more ink where needed before dropping the paper back in exactly the same position. - This was a much more effective technique


I was a bit troubled by the obvious brush marks in the background on my first attempt so I had another try with a smoother background and an even more vivid colour scheme. 


What I learnt:

  • Hinged registration is a good way to allow you to build up an image gradually
  • Akua liquid pigment is difficult to handle but can produce vivid results with perseverance. 

Saturday 24 September 2016

Painted Monoprint from Life

The instructions called for two objects for a simple still life. I started by making a few sketches in my sketchbook of a sunflower from the garden in a vase. It was a very hot day (37 degrees outside). My sunflower was wilting very rapidly and I was struggling to create a pleasing composition. I also began to realise that the sunflower was perhaps a bit complex for my first attempt at a painted monoprint. I ran out of time and as I had to go to the UK for work the following day this idea was abandoned. (Sunflower images will no doubt be recycled at a later date) 


Sketchbook page
Sketchbook page

Sketchbook page


Sketchbook page


When I returned home I decided to keep the vase because I liked its unusual form, its smooth reflective surface and its colour. I hunted around the house for something from of a contrasting colour, shape and texture. I settled on a family heirloom tiny teddy. He is rather scruffy after being manhandled by several toddlers but I thought the texture of his fur would allow for contrasting mark-making versus the smooth surface of the vase. The actual still life arrangement doesn't have any particular personal or symbolic significance - the objects were simple chose for their colours, shapes and textures. The objects were side lit by a daylight lamp. 

I made several small scale sketches in my A3 sketchbook, each one emphasising a different characteristic of the arrangement (negative space, tone, colour, texture) I then enlarged the image to a workable size. The most challenging aspect of this was to make the vase appear symmetrical and balanced. 


I laid a sheet of perspex over the enlarged drawing in my sketchbook and painted with oil based ink (Hawthorn 'stay open' ink) which was diluted with liquin. Even quite diluted, I still found the ink quite difficult to work with. It will take some time and practice to get used to.

I first painted the the negative space in grey, leaving a large area unpainted for the white of the paper to show through in the most brightly lit area. I used a darker grey for the shadows. I then went on to paint the vase in a mixture of manganese blue, sap green and french blue mixed with varying amounts of white to adjust the tonal values. I tried to use few bold strokes to keep a reasonably smooth looking appearance. I took ink away from a couple of areas to serve as highlight.  I then went onto the teddy. I applied The yellow paint here with the tip of a hog's hair brush to give a rough stippled effect. I used cadmium yellow and cadmium yellow with white. The shadowed areas were stippled over the top with french blue. I used black undiluted inch with a small brush to try to het a dry brush pattern for the loose black threads of the ted's nose. 


The plate was too big to go through my little press. Given that I would have to pull the print by hand and, being my first attempt, it was not going to be a masterpiece, I decided to print onto thin, cheap newsprint paper. The advantage of this was that I could see that the print was taking as I burnished it. I was worried the the paper might tear as I lifted it but it stood up to the challenge. I was able to pull a second print from the same plate.


The results were OK - somewhat underwhelming. It was all a bit pale. I like the fact that the brush marks show. I also enjoyed the fact that the process requires a relatively rapid application of the ink (especially in hot weather) so the results are quite 'rough and ready'. 

I remembered that the instructions had called for the negative shapes to be painted in a contrasting colour. The grey I had chosen was not really providing much contrast so I decided to work back into the plate choosing alizarin crimson for the negative shapes and using french blue for the shadows. I worked on the vase with brushes and fingers. I applied the ink to the teddy by stippling again but then went over it with some crumpled up tissue paper which I had soaked in solvent and then blotted off.  This exaggerated the textural surface somewhat but it wasn't very precise so the texture extended into the background. 


I pulled two prints from the plate one fairly vivid and the second a 'ghost' but still with a reasonable amount of ink on the paper. I then re-inked over the ghost and experimented with applying ink more thickly and texturing it in various ways. This really wasn't at all successful - the ink was too thick so it just splodged in quite a random way. 


What I learnt:

  • Painting a representational image with thick oil-based printing inks is very difficult
  • Applying the ink thickly and applying a surface texture to the thick ink is not of value because it all just squishes out flat when you take the impression
  • Therefore applying thin layers of ink is more appropriate
  • Given the difficulty of the technique it is best to keep the design simple until you get more proficient

Things to do and try:

  • Try other ways of adulterating the ink to make it flow more easily
  • Or try other inks
  • Try building an image up slowly:- you will need a system to easily re-register the paper on the plate- that way you won't be forced to work so quickly- you can see how an image is developing and react to that as it goes along (more like a drawing or a painting)


Thursday 22 September 2016

Reduction Linocut Workshop at WYPY

On 17th and 18th September I attended a weekend workshop at West Yorkshire print workshop tutored by Scarlette Homeshaw. Click here to link to Scarlette's Website. 

Scarlette produces highly coloured reduction linocut prints in many many layers. Her work often features architectural or industrial features but the colour schemes are very vibrant. 

Before the course, out tutor sent us some suggested reference material in the form of links to websites which I've added here for my own future reference. 

http://greatnorthartshow.co.uk/the-history-and-process-of-linocut-print-from-paupers-to-picasso/
This gives a brief history of Lino printing

http://www.kevintraditionalprintmaker.co.uk/index.php/process/
Kevin is the artist who taught Scarlette the reduction process - this gives an explanation of his approach. It takes you through a print from start to finish which has about 17 layers to it and is very complex.

She also suggested to looks at the work of Arthur Homeshaw. Click here to link to images of his work on the Artizan Gallery website 
His linocuts are, once again complex and in multiple layers and he seems to be inspired by the local landscape and the elements - he seems to like angular trees misshapen by years of fighting against the wind. Obviously none of us on this beginners course were going to produce anything like this but nevertheless looking at these sites showed us what was possible and was therefore inspiring. 


Day 1:


I had prepared some sketches which were about A5 in size and which I though would be suitable for a reduction linocut. I wasn't that enamoured with the design to be honest - it seemed a bit stiff and twee but I thought it would be straightforward design to get started with. However, when we arrived we were given square pieces of Lino to cut. My composition would not really adapt to a square format so I abandoned it. 


Scarlette often uses photographic imagery as her inspiration but photocopies it into black and white so she won't be unduly influenced by the original colour scheme. I had Brough some photographs with me and settled on a close up of my cat's face. (The cat's name is 'Princess Suzie' -named by my son when he was 6 and a complete misnomer as she is not at all refined but an expert hunter who decimates the local rodent population - giving her the nickname 'killer queen). 


I traced round areas of markedly differing tonal values and colours and then transferred the tracing onto the lino. I re-inforced the drawing with biro as the pencil would have rubbed off after the first printing and cleaning of the lino.


For the first cut of the lino I cut away all the areas which I wanted to show as the white of the paper - the stripe down the centre of her face, highlights on the eyes and the whiskers. I realised I had made life difficult for myself by drawing dots to represent where the whiskers come out of the face - this meant I had to cut around these small dots - It was difficult so I couldn't afford to be a perfectionist about it - I lost some of them and some remained bigger than I would have liked but this seemed to make them more organic so I wasn't too concerned about that. 

We used the grey hessian-backed lino and it wasn't a warm day which made it more difficult to cut. I had heard that putting the lino on a radiator or using a hairdryer on it can help. However, Scarlette warned us that this can sometimes make the lino brittle because of overheating. She suggested we sit on out lino for few minutes to warm it slowly to near body temperature - this worked quite well. I had also invested in a couple of Swiss made cutting tools (one U shaped and one V shaped) which were very sharp and really aided my cutting.

For the first print layer I mixed up a pale fleshy pink colour using lots of opaque white with a touch of red and yellow. Because we were using the Hawthorn 'stay open' inks and we wanted them to dry more quickly to add more layers, we added cobalt driers to the ink when we mixed them up. 

We made a registration guide by placing the lino white we wanted the print to be on a piece of paper the same size as that onto which we would be printing. We drew round the lino then marked one of the corners (the lower left corner) so as always to register the lino to the same corner. We also marked 'top' so we'd remember which way round to place everything. 
We were making an edition of 5 so I printed 5 of my first layer of fleshy pink using the relief press (platen press). You could see an outline from the black biro on some of them but Scarlette assured me that this would not show once further layers were added (and she was right). 

Next I cut out the areas I wanted to remain pink. That included some of the whisker pores, the nose and the third eyelid. By this time (because we had also spent some time on explanations and demonstrations) there was not time to print the next layer. 


Day 2:

I started by printing the next layer in a pale green. I then went away and cut out the irises of the eyes which were the only truly green areas. 

I waited as long as I dared to allow as much drying time as possible but it was obvious that the old based ink wasn't really going to dry in a few hours so we had to print wet onto wet. 

I mixed up a pale yellowy beige colour for the next layer. Of course this mixed with the underlying green but it produced quite an exciting and vivid almost luminous green. I found the process of registration quite nerve-wracking as it was so easy to get it slightly out and I was paranoid about losing the cat's whiskers. 

Next it was time to cut the tabby markings. I was able to go to town a bit more with this with making marks - I enjoyed this bit the most as I didn't have to really stick to the lines religiously. I then overprinted with a very dark Prussian blue. 

There was a but of a grainy texture to the final prints because of the wet-into wet printing and the registration was a bit variable, but overall I am pleased with the results for my first attempt at reduction linocut. Scarlette was a good teacher and I thoroughly enjoyed the course. 


I had to wrap the wet prints in newsprint to transport them home. Some ink transfer occurred onto the newsprint giving a sort of 'counterproof'. I drew into this with a pen and placed it in my sketchbook. 


Tuesday 20 September 2016

Research Point: Degas Monoprints

Look at Monoprints by Degas. How have these been achieved? How Successful are they? Take a close look at one or two of his prints, print them out an annotate them. What can you learn from his prints? Make notes in your learning log. 

Degas was first introduced to the monoprint technique by a fellow artist Ludovic-Napoléon Lepic. In fact the first monoprint signed by Degas was also signed by Lepic which suggests they collaborated on its production. The image is shown below and shows rehearsals at the Paris Opéra.(1)


(1)The Ballet Master (Le Maître de ballet) c.1876 Degas and
Lepic. White chalk or opaque watercolour over monotype
on paper
After his first introduction to the technique. Degas became very prolific and almost obsessive with the technique. He produced large numbers of works (over 300) in two discrete periods of his career from the mid 1870s to the mid 1880s and a shorter period in the early 1890s (2).

His obsession with this way of working was noted and remarked upon by fellow artists, such that he started to be identified with the materials - almost as if he had lost himself in the medium. To quote Marcellin Desboutin in 1876 Degas " is no longer a friend, a man, an artist! He's a zinc or copper plate blackened with printer's ink, and plate and man are flattened together by his printing press whose mechanism has swallowed him completely!" (2)

This obsessive concentration on the technique served him well and he produced wonderful lively monotypes. He was so familiar with the technique and medium that he was able to really push the monotype as far as he could and to improvise. Many of the works seem to have a spontaneity about them and this makes them lively and exciting. They look as though they have been rapidly executed and so contain the artist's energy. Degas described his monotypes as " drawings made with greasy ink and put through a press" (2) which tells us something about the process of their making but only takes us so far. More can be gleaned from looking closely at the prints. 


How have these been achieved?


Degas mainly used plates made from copper or zinc. He also occasionally used daguerreotype plates and celluloid (having the advantage of being transparent for tracing images but not generally his preferred type of plate) (3). He used oil based ink which was designed for etching (ground pigment mixed with boiled linseed oil) and he added small amounts of brown of blue pigment to make the colour warmer of cooler. He worked both in an additive manner and in a subtractive manner - that is he produced prints with a light background by painting and drawing with the ink onto the plate and he produced prints with dark backgrounds by covering the plate with an even layer of black ink and then drawing in negative by removing ink with various tools (3)

The dark field (subtractive) monotypes were printed from larger plates than the light field ones. This is perhaps because he found removing ink with rags and brushes was too difficult on a small plate - he needed more space as the tools are relatively clumsy.(3)

For the additive monotypes he diluted the ink to make it less viscous and facilitate application with brushes and fingers. In the example in figure 2 below, the ink seems to have been manipulated rapidly. The faces are not definitively stated but only suggested which gives a feeling of movement. 


(2) Head of Man and Woman (Home et femme, en buste)
c. 1877-80 (British Museum London)
With subtractive monotypes he used a more viscous ink because it would stay put and not obscure the marks he made by removing it. 

(3)The Fireside (Le Foyer (la Cheminée)) c. 1880-85
(Metropolitan Museum of Art)
He made the marks on the black ink by rubbing with stiff brushes, his fingers, rags, wooden brush handles and sponges. He also sometimes applied solvents (3)

Many of his monotypes employed a combination of subtractive and additive methods. Such as the example in figure 4. 

(4) Pauline and Virginie Conversing with
Admirers(Pauline et Virginie bavardant avec 
des admirateurs) c 1876-77


For this print he started by painting the dark figures and the corridor using different concentrations of ink for the different shades of grey and black. He has used some quite thin washes of ink in places. He then created the effect of light streaming in through the doorways subtractively by wiping away ink. (3)

In his later phase of monoprinting, in which Degas produced predominantly landscapes, he experimented with using oil paints instead of printing inks. This increased the unpredictability of what would happen in the press as the oil paints were more likely to run and move about than the stiffer inks. Unfortunately, with the passage of time the ink has leached out of the oil paints into the paper leaving a 'halo'. 

(5) Landscape (Paysage). 1892 - Pastel over monotype in oil on
able paper (now faded to off white) mounted on board
(Metropolitan Museum of Art)
These landscapes are simplified almost to the point of abstraction. This reflects the way he worked on these. They are not made from direct observation of the subject. He was inspired to produce these monotypes by the view from a train journey. Maybe this vagueness comes from the fleeting glimpse of the passing landscape? Or perhaps it could be because time passed between seeing the landscape and being near a press to produce the images? Either way it seems to be a deliberate move away from detail and over-stating. Degas said that it was important to reproduce only what "struck you, that is to say the necessary. That way your memories and your fantasy are freed from the tyranny of nature".(4)

I have used the term 'monotype' throughout this description of technique, because in many cases, Degas produced more than one image from a single plate. He would often pull a second 'ghost' print (or 'cognate') from a plate after the first print. He also produced 'counter proofs' - that is he printed from the surface of a wet print onto another piece of paper resulting in a reversal of the image. (2). In some cases he altered the image between the first and second print by adding more ink or paint in places producing different 'states' of the same print. (2)

Where cognates or counter proofs were produced, in may cases Degas worked back into these using either pastel, opaque watercolour or a combination of media to produce more detailed drawings. As in the example below:

(6) Three Ballet Dancers (Trois danseuses) c 1878
Monotype on paper (Sterling and Francine
Clark Art Institute)
(7) Ballet Scene (Scène de ballet) c. 1879 Pastel over monotype
on paper (William I. Koch Collection)
As well as the ink used, the paper choices are also important. Degas used China papers, western laid papers, western wove papers and occasionally Bristol board. (3) His choice was dependent on what kind of image he was aiming to produce. The asian papers were thin and absorbent and took the ink very well so they could be used if he wanted delicate brush marks to be seen. (3)

Laid paper has a marked texture because of the way it is produced. This texture is exploited and gives texture to the ink in his monotype of ironing women. This reduces the crispness and legibility of the shapes and therefore contributes to the illusion of movement:


(8) Ironing women (detail) (Les Repasseuses) c. 1877-79
(private collection)


How successful are they?

Very! is the flippant answer to that question. However I will go into some more detail about why I think these are successful works: 

Firstly, thinking about them in the context of the impressionist movement which had turned the norms of fine art on its head by starting to elevate the everyday into a suitable subject for works of art, the monotype is a way of working rapidly. In this way the aim of reproducing a fleeting sensation is served well. (1). For example in figure (2) 'Head of Man and Woman', the faces are barely legible. This really gives a sense of motion perhaps in a bustling Parisian street. 

My personal favourites are the dark ground images of women going about their ablutions or lounging around and getting in and out of bed. Such as the examples shown below: 

(9) The Tub 1876-77 (Biblioteque l'institut national
d'histoire de l'art - Paris)
(10) Woman Drying Her Feet (Femme
s'essuyant les pieds, près de sa baignoire)
1880-85 (Musée D'Orsay, Paris)
The subtractive way of working here achieves a wonderful quality of light - it is particularly effective for giving an impression of low lamplight in a darkened room because there is marked contrast between light and dark but the forms are not clearly delineated and seem to almost dissolve into the gloom. It looks as though Degas had drawn with the light itself. Crucially, however he has known when to stop drawing in order to give just the right amount of suggestion of form to make it legible but without being so overt as to lose the mystery. There is a balance here between the honesty of depiction of the everyday and the execution in leaving some concealment to allow for the use of the viewer's imagination. 

There is perhaps something a bit furtive or voyeuristic about these images. They are all images of prostitutes and you can almost imagine the artist lurking in the almost-dark and capturing their private unguarded (and nocturnal) moments. Are these simply erotic for the purposes of titillation or are they exploratory tonal studies in which the subject matter is incidental? It is difficult to be sure. These monotypes were not displayed until after Degas's death and he didn't mention them in his writings. It is therefore not possible to know his motivation. (5)

Around the same time as these images were reproduced, the advent of photography had resulted in the appearance of pornographic images of naked women. Some of Degas's models assume similar poses to the women in these photographs. However the distinction is in the fact that they are pictured as an integral part of their environment and they do not engage with the viewer but carry on with their activities without appearing self conscious. Also they do not have the same stark realistic precision as a photograph does. Raisa Rexer says- " In this comparison with pornography, the seeming illegibility of the brothel monotypes, the strange dissonance between their indecent content and their compositional innovations, resolves into clarity. That dissonance is their achievement: a simultaneous evocation and disavowal of pornography, a form whose significance rests on the content it belies. The two qualities that seem so opposed are in fact completely intertwined. Degas's feat is equally remarkable in social and aesthetic terms; whatever his personal involvement with the prostitution industry may have been, he created images that constitute as much an exposé of the traffic in the female body as they do an artistic revolution"(5)

The later, landscape monotypes are also successful apart from in the choice of oil paint on paper which has resulted in leaching of oil in to the paper. My preference, however is for the more abstract pure monotypes which have less legibility in terms of form and pictorial space and are more abstract and more about the marks made by the medium. In many of the monotypes, Degas has worked over them extensively with pastel making them more obviously impressionist drawings. The purer monotype versions remind me to a certain extent of Turner's sketchbooks in their simplicity. 
In the example below, the subject matter can be just about read with reference to the title but is not explicitly stated. 


(11) The Road in the Forest (la Route dans la Forêt) 1890
(Harvard Art Museums/Fogg Museum)

In contrast -  figure 12 has been worked into with pastel and the drawing made much more legible. The shimmering dots of colour are quite beautiful but this owes more to the pastel drawing rather than the underlying monotype:


(12) Landscape with Rocks (Paysage avec rochers). 1892
Pastel over monotype in oil on paper
(High Museum of Art, Atlanta)


Take a close look at one or two of his prints, print them out and annotate them. 

I have annotated some prints in my sketchbook:

(13)Woman in a bathtub (Femme au Bain) c 1880-85 (private collection)


  • Subtractive (dark ground) monoprint
  • Landscape format
  • Rim of bath draws eye in circular motion
  • Taps draw eye back onto the woman
  • Focal points - face (highlight on ear), foot
  • Arm washing leg creates diagonal up towards the foot. 
  • Light source in upper left but generally very dark
  • large vocabulary of marks
  • light brush marks in the background
  • Bright contrasting lines on tap reflective surface poss made with a piece of card or a palette knife?
  • Back part of bath probably rubbed with a rag
  • Stippled effect on face ? tip of a stiff brush or small spatters of solvent?
  • More distinct brush marks in the water
  • Foreground edge of bath and highlights on foot probably made with a brush handle
  • Face primitive (neanderthal/simian)
  • Hands and feet are chunky and clumsy 
  • Analogy between the wiping action of the woman and that of the artist


(14) Woman in her Bath, Sponging her Leg (Femme dans son bain s'épongeant la jambe)
c 1880-85 (Musée d'Orsay, Paris)
  • Cognate overdrawn with pastel
  • Very different to the first impression - 'prettified'
  • Much more light flooding in and reflecting from the water - daylight - the other looks nocturnal
  • Face hands and feet are more refined
  • Taps are missing and bath is a narrower ellipse
  • Does not engage with viewer only her own body
  • Looks like she is really getting clean - in the other the water is murky
  • ? less of an honest impression of the brothel scene-made more palatable deliberately
  • Less raw/base

What can you learn from his prints?


I have enjoyed researching this subject and there are several points I can take away from this in going forward:

  • Keep trying! Degas learned to handle his medium by being prolific and pushing forward
  • Try diluting the ink more and making washes in additive monoprints
  • Stiff, viscous ink is good for subtractive work
  • Use a combination of both additive and subtractive- keep manipulating the ink until you get what you want
  • Consider the effect of the texture of the paper and exploit this where appropriate
  • Oil paints on their own will produce an oily halo
  • It is possible to build up a large vocabulary of marks with simple tools
  • Dark ground monoprints are especially good for tonal contrast
  • It is not necessary to be too literal in your drawing (nor is it often possible)
  • Chance will play its part - is is not always possible to entirely predict what will appear when pulling a print- things can change in the press or hand printing process


References:

(1) R. Kendall, "An Anarchist in Art: Degas and the Monotype" in "Degas: A Strange New Beauty" J. Hauptman . MoMA, New York, USA 2016 pp 20-36

(2) J. Hauptmann, "Introduction" in Degas: A Strange New Beauty" J. Hauptman . MoMA, New York, USA 2016 pp 12-19

(3) K. Buchberg and L. Neufield, "Indelible Ink: Degas's Methods and Materials" in "Degas: A Strange New Beauty" J. Hauptman . MoMA, New York, USA 2016 pp 47-53

(4) J. Beyer "Movement and Landscape" in "Degas: A Strange New Beauty" J. Hauptman . MoMA, New York, USA 2016 pp 177-179

(5) R. Rexer "Stockings and Mirrors" in "Degas: A Strange New Beauty" J. Hauptman . MoMA, New York, USA 2016 pp 137-141


Image Sources:

(1) https://images.nga.gov/en/search/do_quick_search.html?q=%221964.8.1782%22

(2) https://blogger.googleusercontent.com/img/b/R29vZ2xl/AVvXsEhr54cULyRFbAGCWw0w7Z-SNkwWWi6crblVPp7Q_l4A_Sj_kW3LwVFCSXxVNm70WmFklltFrBFqRGA92862dA6BBXrG8Es4HAsUb1Q0EgSQjp64r7G2yiBjyjjwma2FRP0kBf-de33lQS4/s1600/2.+headsofamanandawoman.jpg

(3) https://static01.nyt.com/images/2016/03/25/arts/25DEGASJP1/25DEGASJP1-superJumbo-v3.jpg

(4)http://assets1.bigthink.com/system/tinymce_assets/2545/original/paulineandvirginieconversing.jpg?1462193990

(5) http://www.metmuseum.org/toah/images/hb/hb_1972.636.jpg

(6)http://www.frick.org/sites/default/files/exhibitions/objects/Clark_09_1955_1386_Final_2000.jpg

(7)https://blogger.googleusercontent.com/img/b/R29vZ2xl/AVvXsEjrZnpQkV8WDzf1bx9P5937a7GUHibU6xCuMal4k-Ds3pxsWsLTiwkx-JVb208OU5-l1hM9o0yiASB5jbTQIyeX-zqcf21158CifRjz5f0noI6KZK8cgxD2ZTmt4RFUrqlFzYHv7vc6LRg/s1600/5.+++balletscene.jpg

(8) https://pbs.twimg.com/media/CfdO2S3XEAAR_AA.jpg

(9)http://65.media.tumblr.com/7f64d835a0d0bbbd685de891f9995df9/tumblr_inline_nnf6r8FzT51t5b0i6_1280.jpg

(10)https://s-media-cache-ak0.pinimg.com/236x/0c/6f/d5/0c6fd552f60c86b2d4a6b6441fd72e6d.jpg

(11)http://ids.lib.harvard.edu/ids/view/17825801?width=3000&height=3000

(12)http://1vze7o2h8a2b2tyahl3i0t68.wpengine.netdna-cdn.com/wp-content/uploads/2016/04/moma_degas_landscapewithrocks-e1459528081497.jpg


(13)https://modernartnotespodcast.files.wordpress.com/2016/04/degas-woman_in_a_bathtub-c-1880-85.jpg?w=1100

(14)https://modernartnotespodcast.files.wordpress.com/2016/04/degas-woman_in_her_bath-c-1880-85.jpg?w=1100