What I did:
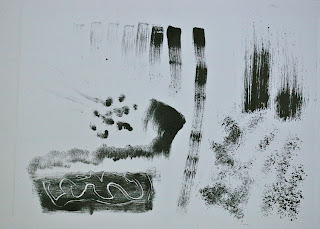
Today I decided to keep thinks simple by using only black ink in order to concentrate on investigating the different marks I could make. I added a small amount of liquin to the Hawthorn 'stay open' oil based ink in attempt to make it easier to work with. I still found it very tacky. I made marks with a variety of brushes by dragging the brush across the plate giving a dry brush effect and then by stippling and rolling the brush. I applied sufficient ink that I was able to take two prints from the plate. I used thin plastic plate which was approximately A4 in size and used my tiny etching press to pull the prints onto thin cartridge paper.
Next I tried working subtractively. I rolled a thin layer of ink across the whole plate and removed the ink in various ways. I used the tip of a pencil and the wrong end of a paintbrush to scratch out sharply defined lines. I used the edge of a small piece of cardboard to scrape out some ribbon-like marks. I used a rag and my finger to rub away ink. In one area I added a small amount of turps. Waited a few seconds then dabbed it off before printing.
I took a second 'ghost' print from the same plate.
I then selectively re-inked certain areas of the plate with the roller and made more marks with the edge of the cardboard and the end of a paintbrush. I also placed my gloved palm on the surface of the ink which removed a small amount of ink. I then drew into this hand-print with cotton buds and a pencil. I also added a splash of turps again.
I placed a large blob of thick red ink on the plate as well as creating a thick wiggly line of the ink with a brush. I then took a roller and rolled a thin layer of black ink over the top. The thick red ink resisted the black and the roller also picked up the red ink creating a repeating pattern chi I found quite interesting.
Next I cleaned and re-inked the plate with black ink. I placed a small pool of turps on the plate and tilted the plate to make it run about. I left it to dissolve the ink for a few seconds and then dabbed it off. I really liked the random organising curving lines this made. However, there was an area in the corner I didn't like so I printed again on top with red aiming for an effect a bit like a rose. I put too much red ink on here and it really didn't work.
It looked a bit more like a rose on the second print from the same plate bu the rest of the print was now too pale relative to the rose. I wished I'd left it alone.
I really still liked the marks in other areas of this print though so I experimented by cropping in various ways - it works much better when cropped as an entirely abstract print. You can see in the cropped version that the rolling of the ink wasn't entirely even and there is a graininess to the print on cartridge paper. I really like these characteristics however - even if they might be considered faults.
What I Learnt:
- I like subtractive mark making on a film of ink
- Solvents can create interesting marks especially when allowed to run
- Rolling one colour of ink over another can create interesting repeats
- If one part of a print doesn't work you can keep parts of it which are interesting


No comments:
Post a Comment