On 28th August I attended another Lino printing workshop tutored by Kirstie Williams. This one was at The Bowery Gallery and Art centre in Headingley, Leeds. Click here to visit the Bowery's website.
What we Did:
This is a small arts centre and so we did not have access to printing presses - this meant I got to practice and get some tips on hand burnishing which I had found quite difficult during the first Lino workshop I attended.
I based my first linocut on a continuous line drawing I had done in my small sketchbook of my 15 year old son. I quite like the expression on his face - i is very teenage - but is it insouciance or defiance?
We used A6 sized soft-cut lino and ABIG lino cutting sets which have a wooden handle and interchangeable blades. We printed using Hawthorn 'Stay open' oil based inks.
The continuous line proved ideal for simple cutting and I found I was able to keep the character of the line quite well by moving the lino around as I cut rather than having to turn my wrist and to keep stopping and starting. I used two different cutting tools to vary the wight of the line and to give some impression of light hitting one side of his face.
 |
Sketchbook page showing the original drawing
and there resulting lino print |
I took several impressions from the plate: Some more successful than others. The one below shows that I missed certain areas with the spoon I was using and didn't apply sufficient pressure. After several attempts, however, I felt I was starting to get the hang of it and produced some reasonable prints.
 |
| Hand burnished one colour lino print |
Luca recognised that it was a portrait of him without prompting and was quite pleased with it - he suggested he might scan it and use it for his online profile picture. High praise indeed considering he's a teenager!
I had done some research before the workshop and collected potential source material. For my second print I wanted to try making different marks with the various tools available. Having researched Van Gogh's pen and ink drawings for the OCA Drawing 1 course I though these might provide a suitable inspiration for mark making. I also looked at woodcut prints and paintings by another Dutch artist Jan Mankes. I made a few very rough sketches in my sketchbook:
 |
Sketches based on Van Gogh's pen and ink
drawing of 'The Sower' and Jan Mankes'
Woodcut of a chicken 'Zilverwyandotte' 1917 |
 |
Sketches based on Mankes 'Avenue of
Trees' 1917 and Van Gogh pen and ink drawing
|
I eventually settled on a relatively simple pen and ink drawing by Van Gogh which offered a lot of scope for mark making on the lino. I drew directly onto the lino in pencil using the drawing as inspiration rather than making a copy. I found that I could make very fine lines by using the fines V tool in the box and barely applying any pressure when cutting - this did not feast a deep cut but was sufficient to leave a fine white line if the plate was not over-inked.
I experimented with hatching using these very fine lines in the background areas of the landscape. I used a wide U tool to gouge out the majority of the sky which was the lightest area of the original drawing. I then tried a variety of tools to cut flower shapes and a turning motion to cut out little dots of lino with got smaller further up then plate to give an impression of distance.
I proofed the plate in black ink and then went back in with the cutter to create more marks. I think I overdid it with the hatching in the middle ground and I prefer the first proofed version. It was a good exercise in mark making however. I also realised that the composition I had drawn freehand onto the lino was better than the actual print because on the block there was a diagonal line leading the eye up from the lower left hand corner - of course this was reversed in the print !
I tried printing this onto yellow paper using dark blue ink but it didn't print well - I don't think I applied sufficient ink to the plate, the plate moved while I was burnishing, the paper was thicker than the previous cartridge paper and I wasn't able to apply sufficient pressure with the spoon to compensate for this.
 |
Unsuccessful attempt to hand burnish a print on thick
yellow paper
|
 |
Hand burnished lino cut on cartridge paper with blue ink.
Insufficiently burnished in the right hand third of the print. |
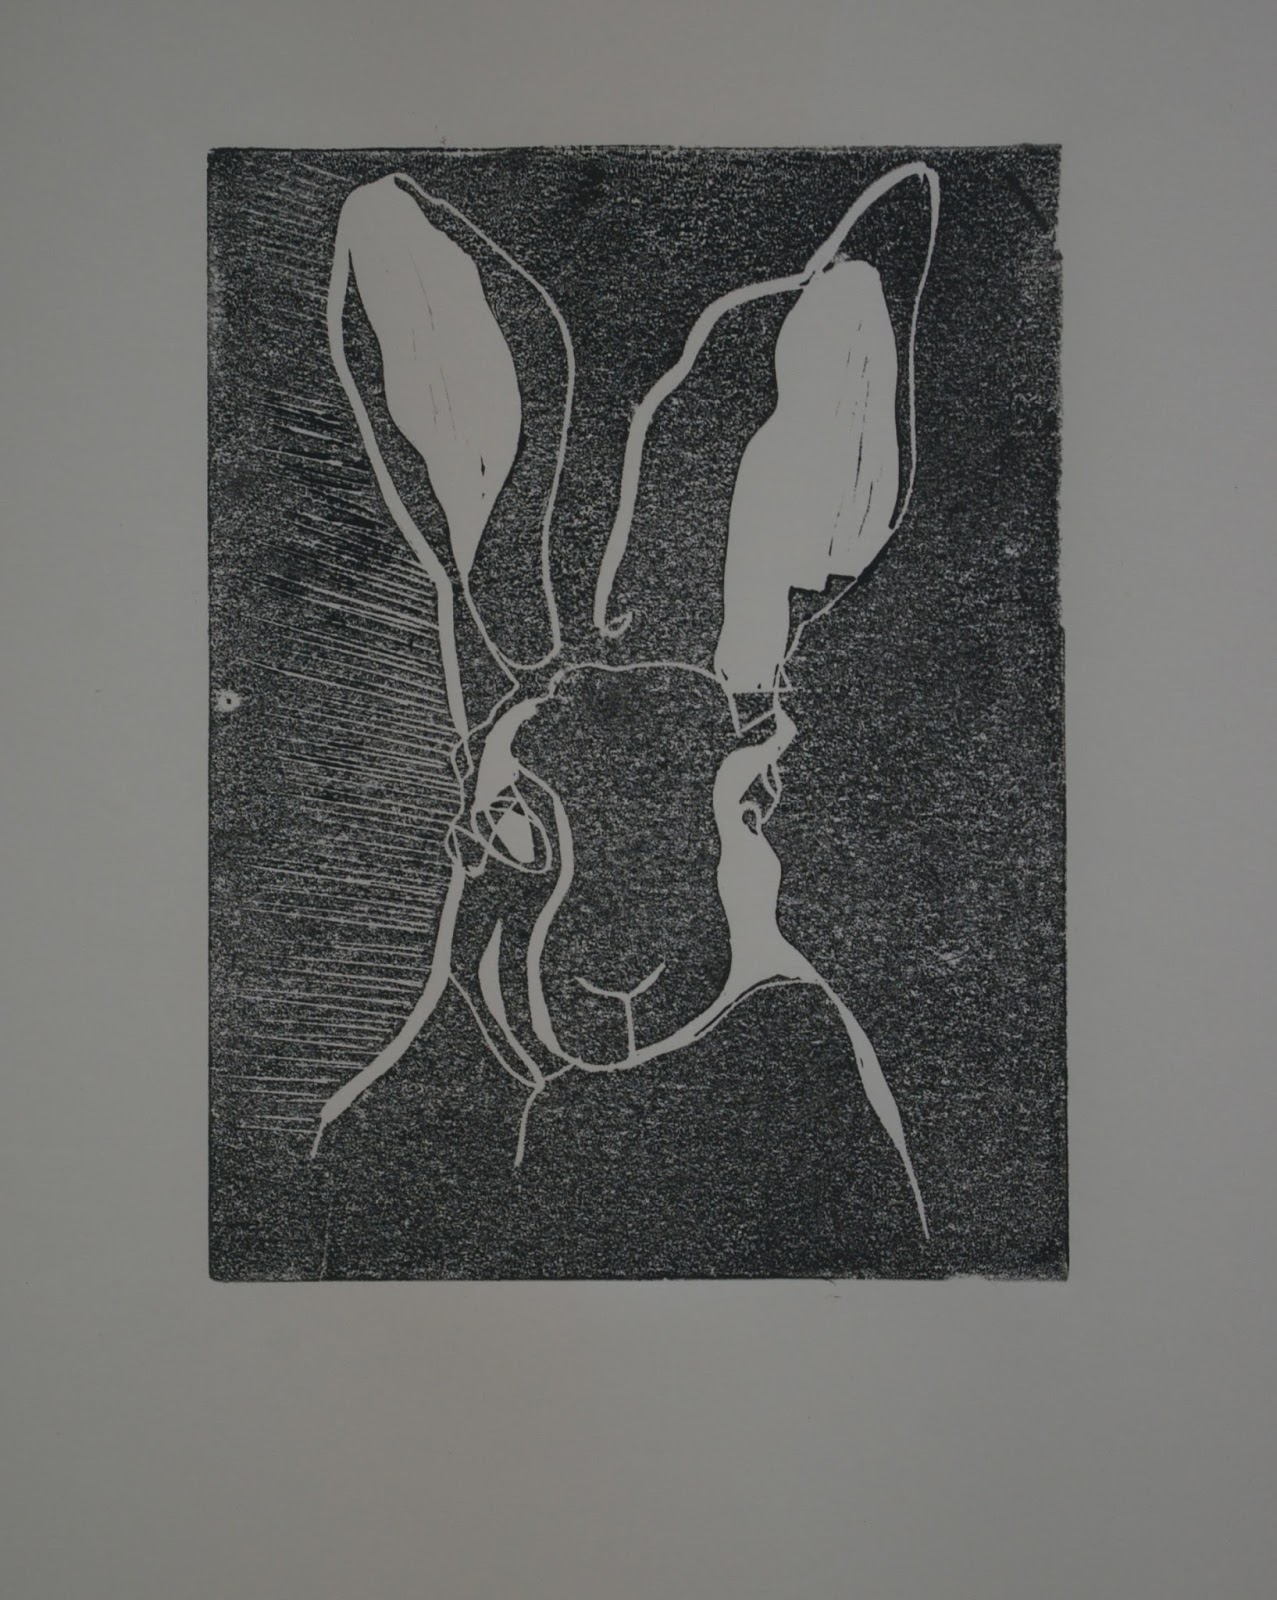
When I got home I was inspired to try out lino printing using some water based block printing inks I had ordered and a speedball baren which is teflon coating allowing it to slide over the paper. Speedball Baren. I also used the grey hessian backed lino. I had anticipated that this would be difficult to cut - this may have been aided by the fact that it was a very hot day.
The cleanup process with the water based inks was much easier than with the oil based inks - they might be useful for proofing when I'm not sure whether I've cut enough out.
What I learnt:
- Line drawings can be transferred quite well to lino without losing the original fluid character of the line
- A lot of pressure is required with at least two fingers in the bowl of a spoon when hand burnishing
- Burnish in a methodical manner from one side of the plate to the other to avoid missing patches
- Water based inks are not as thick and don't produce as vivid a print when hand pulled as the oil based inks
- The thickness of the paper makes a dramatic difference to the print pulled by hand (thinner is better)
- Water based inks are easy to clean up
- Don't cut the lino on the same table as your inking block - EVER!!!
- A variety of tools handled in different ways can produce a large vocabulary of marks on the lino
- Remember that your print will be the reverse of what you draw on the lino if you are drawing freehand (tracing automatically compensates for this reversal)
- Stop cutting before you think you should and proof the print - you can always cut more away but you can't put it back!
Things to Learn and Try:
- Using the water based inks on various papers through the press
- Visualising and planning lino prints other than simple line drawings
- Reduction linocut technique
- Etching Lino


No comments:
Post a Comment